The Best Cookie Cutout Recipe EVER!
October 14, 2012 § 1 Comment
I cannot and will not take credit for this tasty cookie dough recipe. It is my mom’s recipe. Where she got it, I don’t know. It may just be one of those secret family recipes! 🙂 If it is…SORRY MOM! The secret is now out.
There are many different recipes for this type of sugar cookie dough. What I know about this recipe is that it is amazingly good. REALLY! No fool’n!
I remember making cookie cutouts with this dough as a child. They tasted so good. I think maybe the secret to this recipe is the orange peel. My Suggestion: Give this recipe a try! It may even end up being your “go to” cookie cutout recipe. It is mine.
Nonee’s Sugar Cookie Cutouts
- 2/3 cup unsalted butter, softened
- 3/4 cup granulated sugar
- 1/2 teaspoon finely grated orange peel
- 1/2 teaspoon real vanilla
- 1 egg
- 4 teaspoons milk
- 2 cups sifted flour
- 1 1/2 teaspoons baking powder
- 1/2 teaspoon salt
Cream together the butter, sugar, orange peel and vanilla. Add the egg and beat with mixer until light and fluffy. Stir in the milk. In a separate bowl, sift together the dry ingredients. Slowly add the dry ingredients into the wet ingredients until incorporated. Divide the dough into 2 halves. Wrap each with plastic wrap and refrigerate for at least an hour.
Preheat oven to 375 degrees. Once the dough has chilled, unwrap and place on a light floured surface. Roll the dough out to approx. 1/8 inch thick. Cut in desired shapes with cookie cutters and place shapes on a lightly greased cookie sheet or silpat. Bake for about 6-8 minutes. Remove from oven and let the cookies sit for a minute before removing them to the cooling rack. Letting them sit for a minute with help them not come apart when transferring to the cooking rack.
Once cool, decorate! I love when the kids decorate them. They love doing it and they have such great decorating ideas. Be sure to get a lot of sprinkles. Kids love sprinkles.
Now to my favorite part. EATING THEM! Some hold me back…
“Hangover” Rum Cake
August 12, 2012 § Leave a comment
The name of this cake says it all. You could possibly get a hangover from it if you ate too much of it at one time. All in all, it is made with 1 cup of rum. YUM! This just came to me…It could also be called Double Duty Rum Cake – dessert and after dinner drink all in one.
This is not one of my original recipes. I acquired this recipe in a recipe box we received as a gift when my husband and I got married. It came from my husband’s aunt but not sure she was the originator of this recipe. Regardless, we need to say, “Thank You, Aunt Linda!” This recipe has been one of our family favorites for the last 12 years and is sooo good that we needed to share it with all of you.
Rum Cake
-
1 package yellow cake mix
-
1 package instant vanilla pudding mix (3.4 oz box)
-
4 eggs
-
1/2 cup cold water
-
1/2 cup canola oil
-
1/2 cup rum (dark or light)
Preheat oven to 325 degrees. In a large bowl, add the cake mix and pudding mix and all the wet ingredients. Mix well with a hand mixer. Spray bunt pan with nonstick cooking spray. Pour in the batter. Bake for 1 hour. Remove from oven and cool on wire rack until slightly warm. Remove from pan and place on cake plate. Prick the top of the cake with a toothpick to make holes for the glaze to soak into. Pour glaze over cake until all the glaze is gone.
Rum Glaze
-
1/4 unsalted butter
-
1/4 cup water
-
1 cup sugar
-
1/2 cup 80 proof rum (dark or light)
Melt butter in a medium size sauce pan. Add the sugar and water. Boil for 5 minutes, stirring constantly. Remove from heat and stir in rum. It will bubble up when the rum is added. Don’t let this alarm you. Just keep stirring. Drizzle as directed above over the rum cake.
Our Aunt’s recipe called for pecan nuts to be put into the bottom of the bunt pan prior to baking. My husband isn’t a big pecan fan, so I make this cake without them. If you like pecans, feel free to add a cup of pecans to the bottom of the pan before pouring in the cake mix.
This cake is amazing all by itself; however, you could also drizzle macerated berries over the top for a twist on shortcake! Oh Yeah! Delish!
Be careful how much of this you eat…Remember…it’s called Hangover Rum Cake for a reason!
Freshly Squeezed Lemonade
July 8, 2012 § 2 Comments
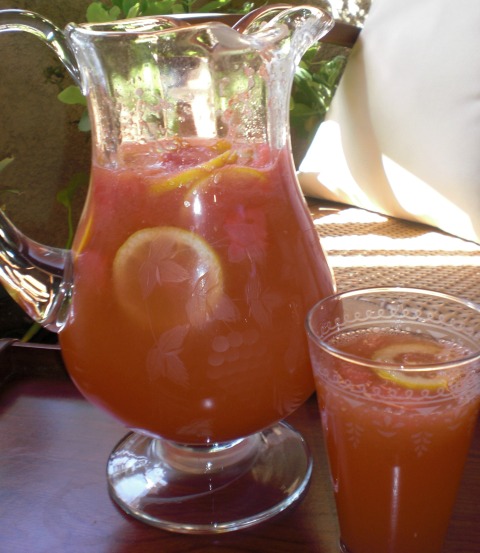
Homegrown and Freshly Squeezed
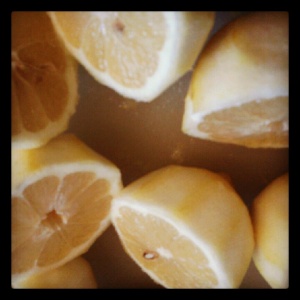
I recently striped these lemons of their peels to make limoncello and needed to figure out what to do with the remaining lemon goodness. I decided a delicious, non-alcoholic drink would be nice. There truly couldn’t be a better time for lemonade than during the hot summer months.
I enlisted Graham’s help in reaming the lemons. He said it was kind of hard to do, but agreed, we had a blast making this recipe together. I was even able to convert him to a lemonade liker and drinker!
This is a super simple recipe. It can be cut in half or doubled depending on how much lemon juice you use.
Lemonade
-
2 cups freshly squeezed lemon juice
-
2 cups super fine granulated sugar
-
8 cups water
Juice the lemons into a container. Strain out any pulp and seeds. Pour into large pitcher. Add the fine sugar and water. Mix well. Make sure all the sugar has dissolved before serving. Garnish with slices of lemon. Chill and serve.
NOTE: I use the fine sugar so it dissolves quickly. If you don’t have fine sugar then I would suggest making a simple syrup with the 2 cups sugar and 2 cups of the water to ensure there won’t be any sugar sludge at the bottom.
Crispy and Chewy: Chocolate Chip Raisin Cookies
July 6, 2012 § 2 Comments
Chocolate Chip Raisin Cookies
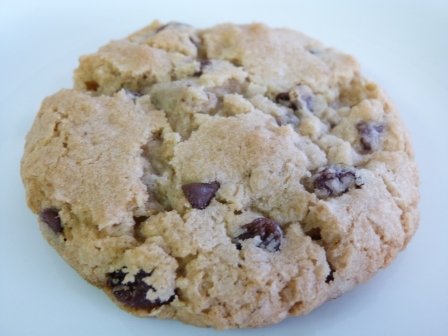
I created this recipe after I had promised oatmeal raisin cookies to my family before I checked whether I had all the ingredients to make them. Oops! I was short on oatmeal, so ended up manipulating the ingredients. This cookie is the result of my efforts. It is crisp on the outside and chewy on the inside. My family actually likes them better than the ones I was going to make. I don’t ask if they want oatmeal raisin cookies anymore. I ask if they want chocolate chip raisin ones. Their answer: YES!!!!
-
3/4 cup unsalted butter – softened
-
1/2 cup packed brown sugar
-
1 cup granulated sugar
-
1 egg
-
1 teaspoon pure vanilla
-
1 cup rolled oats
-
1 1/2 cups all-purpose flour
-
1 teaspoon baking powder
-
1/2 teaspoon baking soda
-
1/2 cup raisins
-
1/4 cup mini semi sweet chocolate chips
Preheat oven to 375 degrees. In a large bowl, combine the softened butter, brown sugar and granulated sugar with a mixer. Once combined add the egg and vanilla. Mix with mixer. In a smaller bowl, combine all the dry ingredients. Slowly add the dry ingredients into the wet ingredients until all is incorporated. Add the raisins and mini chocolate chips. Mix.
Scoop a tablespoon of dough and roll it into a round ball. Recipe will allow you to make approx. 30 balls (cookies). Place 12 balls on a medium size, non-stick, cookie sheet or one lined with a silpat. Bake for 12 minutes. Upon removing the cookie from oven, let them sit on the cookie sheet for 2 minutes before moving to the cooling rack. If you miss this step, the cookies may want to fall apart upon removal. If you wait those 2 minutes, it allows them to cool slightly and are easier to move to wire rack. Let cookies cool. EAT!
Warning: These seem to disappear quickly. May want to hide some for later!
Lemons + Vodka = Limoncello
July 3, 2012 § 2 Comments
I was the lucky recipient of a grocery bag full of homegrown, organic lemons from my in-laws tree. So my thought was…when you’re handed lemons make Limoncello. Well maybe not everyone thinks to make limoncello but my mother-in-law planted the seed and all I can say is – I’m glad she did. The limoncello turned out perfectly delicious. It was so perfectly tasty that we ended up gifting the limoncello back to them; however, not all has been gifted away. I have 2 more batches brewing. 🙂 UmHm, I know you want some so I’ll call you when it is ready. If you can’t seem to wait that long, here is my secret recipe so you can brew a batch (or two) at home.
-
6 – 10 lemons (6 if they are large, 8 if medium and 10 if small)
-
1 – 750 ml bottle of vodka (any brand)
-
2 cups cane sugar
-
3 cups water
Wash the lemons really well with a brush under cool water. With a sharp knife, cut the peel off of the lemons. Make sure not to include any of the white part (pith). This will make your limoncello bitter. Place the peel into a container with a lid. Pour the entire bottle of vodka into the container. Let steep for at least 4-5 weeks (longer if possible). After at least a month of sitting, it is time to make the simple syrup. Pour 3 cups of water and 2 cups of sugar into a sauce pan. Heat the water to allow the sugar to dissolve. Once dissolved, cool the water. Strain the infused vodka to remove all the lemon peel. Marry the lemon vodka and syrup together. Pour into decorative bottle and chill for a few hours in the fridge. Serve in small cordial type glasses. This is a classic, Italian, after dinner drink to be sipped and enjoyed. I hope you make this and enjoy it. We certainly will! Cheers!
Now…what to do with all those naked lemons!?! Hmmmm…I KNOW…LEMONADE. I just happen to have the perfect recipe. Stay tuned!
Broccoli Bites (for the kid who won’t eat his veggies)
May 26, 2012 § Leave a comment
Broccoli Bites
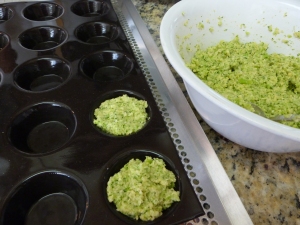
I just bought a new baking pan from Demarle at Home and am trying it out on many of my house favorite recipes. I usually make this Broccoli Bite recipe by cooking them like a patty in olive oil. This new way allows for less fat which makes them more healthy. If you don’t have a Demarle medium tartlet pan as I do, you can just bake them on a cookie sheet or cook them in a little olive oil (still a family favorite this way). My son eats these first when they are served at dinner time and ALWAYS asks for a second helping. Yippee!!
-
2 cups cooked broccoli
- 1/2 cup grated cheddar cheese
- 1/4 cup ricotta cheese
- 1/4 parmesan cheese
- 2 eggs
- 1/2 cup panko bread crumbs
- 1 1/2 tablespoons olive oil
- 1/4 teaspoon Emeril’s Essense (LOVE this seasoning! You must get some.)
- 1/4 teaspoon salt
- 1/4 teaspoon ground pepper
Cook broccoli in microwave until tender (usually 3 – 5 minutes depending on microwave). Once cooked, set aside to cool. When cool, place broccoli into food processor. Add all remaining ingredients except the bread crumbs. Pulse to combine. Turn out mixture into bowl and add the bread crumbs. Stir to mix in bread crumbs. Place a spoonful of mixture into each Demarle medium tartlet pan cup.
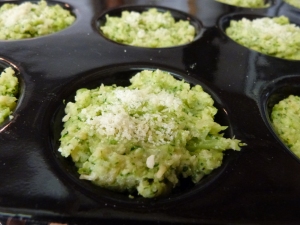
Fill each cup to the top. Add a small sprinkle of parmesan cheese to the top of each one. Bake at 375 degrees for 20 minutes. Remove from oven and let cool in pan for 5 minutes before serving. Should be able to make 12-14 bites with this recipe.
Don’t forget – You can also make these into patties and cook them in a pan with a few tablespoons of olive oil. Thought I had a picture of them fried up but cannot seem to find it. Will keep looking…
Berry Cherry Pie
September 18, 2011 § 3 Comments
I believe I have finally conquered my achilles heal…pie making. Practice makes perfect and this pie turned out pretty perfect, in my opinion (see whole pie below). Not a piece of this one went uneaten. Actually, we were disappointed when it was gone. Guess I will just have to make another one.
Look out friends and family. Now that I have pie making figured out, you can expect to see me arriving to your house with a pie. I hope you all like pie. I am now taking orders. You know, apple season is coming…
In order to make this pie, you must first start out with my Mom’s Pie Crust (This really is my Mom’s recipe. Thanks Mom!). No other crust will do. Really! This crust is a must.
Mom’s Pie Crust
- 4 1/2 cups all-purpose flour
- 1 teaspoon salt
- 1 1/2 cups shortening
- 1 egg
- 1 tablespoon lemon juice
- 1/2 cup ice water
In a large bowl, add the flour and salt. Blend in shortening with a pastry blender. In a small bowl, crack egg and beat with a fork until yolk and white are mixed. Add lemon juice and water to the egg. Pour mixture into the flour mixture. Knead together. Divide the dough into 4 equal balls. Wrap in plastic wrap and refrigerate for 20-30 minutes then roll out. Makes 4 pie crusts. This recipe can be cut in half but you’ll still need 1 egg.
Take one of the balls and roll it out with a rolling-pin. Line a 9″ pie plate with it. Roll out second ball of crust and set aside.
Berry Cherry Filling
- 2 – 16 oz bags of frozen berry cherry fruit from Trader Joe’s, slightly thawed (this mixture includes blackberries, raspberries, blueberries and cherries)
- 3/4 cup of granulated sugar
- 1 teaspoon pure vanilla extract
- Juice from 1 lemon
- 1/4 cup instant tapioca
- 1/4 cup milk
- Coarse sugar
Place berries in a large bowl. Add the sugar, vanilla, lemon juice and tapioca. Mix together. Pour into the prepare 9″ pie plate that you already lined with the bottom crust. Top with seconded rolled out crust. Trim the crust (if needed) and crimp together edges. Brush the crust with milk and sprinkle coarse sugar over it. Add slits into the top the pie. This allows the steam to be released when cooking. To avoid over browning the edge of the pie, cover edges with aluminum foil. Bake at 375 degrees for 50 minutes. Remove foil and bake for another 30 minutes until top is golden brown. Let cool. It is best if the pie sits for a few hours so the juices can set-up. Makes 8 heavenly slices.
Sweet Summer Sangria
September 15, 2011 § 1 Comment
Sangria (Spanish: Sangría) is a wine punch typical of Argentina, Uruguay, Spain and Portugal. It normally consists of a wine, chopped fruit, and a sweetener. Some people like to add brandy to it but I like to add club soda for a little bubble.
I created this specific sangria recipe because I had a ton of watermelon and needed something to do with it. It turned out so good that I wanted to share it with you.
Sangria is truly one of the best summer drinks around and should be enjoyed with friends on your back patio. Make this and call over your neighbors for an end of summer visit. They’ll be so happy you did.
Sweet Summer Sangria
- 3 cups of watermelon, cubed
- 1/2 cup orange juice
- 1/2 – 3/4 cup fine granulated sugar (depends on how sweet your watermelon is)
- 1 orange, sliced
- 1 lemon, sliced
- 1 bottle white wine
- 3-4 cups club soda
In a small sauce pan, combine orange juice and sugar. Heat over low until sugar has completely dissolved into the juice. Cool. Take 2 cups of the watermelon and blend it up in a blender. Pour the watermelon juice into a pitcher along with the sweetened orange juice. Add the wine, remaining cup of cubed watermelon and sliced fruit. Chill in refrigerator for 2-3 hours. Once chilled, add the club soda. Pour over ice and drink up.
Thin, Crispy and So Tasty: Onion Strings
September 11, 2011 § 2 Comments
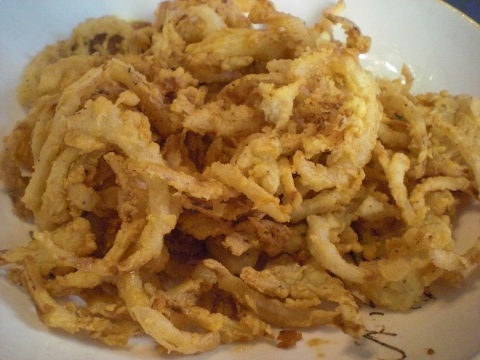 What goes great with onion rings? A great big juicy hamburger, of course! But whenever my husband and I think of onion rings, it reminds us of Papa Hammer. When he would cook steak, he would also cook up a big batch of crispy onion rings. Papa Hammer would marinate the slice onion overnight in buttermilk. He used to say that this was the key to a great onion ring. So in true Papa Hammer form, I too marinate my strings in buttermilk. This recipe is a tribute to him. Who knows, he might have even liked these better than his own rings. Maybe. Just maybe. 🙂
- 1 sweet onion, thinly sliced
- 2 cups of buttermilk
- 2 cups of flour
- 1 tablespoon salt
- 1/2 teaspoon ground black pepper
- slight pinch of cayenne pepper
- 1 qt canola oil
Thinly slice the onion and place into a bowl. Pour buttermilk over the top and let sit for at least 4 hours (longer if possible). In a large dish, mix together flour, salt, pepper, and cayenne. When ready to cook, pour canola oil into a large pot or fryer. Heat to 350 degrees. Remove onion from bowl in small batches and dredge in the flour mixture. Fry each batch until golden brown. Drain on paper towel and season again with salt right after they come out of the oil. Repeat until all the onions have been fried. Eat them with whatever you like or just by themselves. Hopefully you won’t eat them all before they get to the table. They are addicting and totally irresistable.
(Below is my sweet boy with a huge bowl of onion strings)


