Beer Bread
July 31, 2011 § 2 Comments

This is an old recipe from when I was a kid. If memory serves me correctly, my aunt Norma Jean was the first person to bring this recipe into the family. If my memory isn’t exactly right, I’m sure my mom will let me know. Anyhow, we loved the bread so much that my mom started making it and so the recipe chain began. This bread was my first taste of beer and apparently I like it…a lot (and still do). Beer bread was on my favorites list back then and still is to this day.
I absolutely love the crispy edge of this bread (which is from the butter). I could just eat the edges! But the truth is that when it comes out of oven, I want to eat the whole loaf not just a slice. Slightly warm with butter is my preferred way of consumption. This bread also goes really well paired up with meat loaf. Yes, I said the word – meat loaf! Anyhow, now I’m getting hungry. Good thing I have a whole loaf of beer bread to eat! Should be gone by morning.
The original beer bread recipe that had been passed down to me called for self-rising flour. I typically don’t buy this type of flour, so this recipe has been modified using all-purpose flour. The key to this bread turning out perfect is to sift the flour. Don’t leave this step out otherwise you’ll unintentionally bake up a brick. I’ve actually forgotten this step before only to bake up something that should be part of my homes foundation. Not good. So please remember to sift.
Beer Bread
- 3 cups all-purpose flour, sifted (must sift)
- 3 teaspoons baking powder
- 1 teaspoon salt
- 1/4 cup sugar
- 1 – 12 oz bottle of beer, room temp.
- 1/4 cup melted butter
Preheat oven to 375 degrees. Grease loaf pan with butter. In a medium size bowl, SIFT together the dry ingredients. Add beer and mix together. Pour into loaf pan. Pour the melted butter over the top. Bake for 45 – 55 minutes, depending on oven and whether you are using a glass or metal pan. Metal pans take less time to bake. When done, the top will be a nice golden brown. Let cool for about 15 minutes on wire rack. Slice. Butter. Eat!
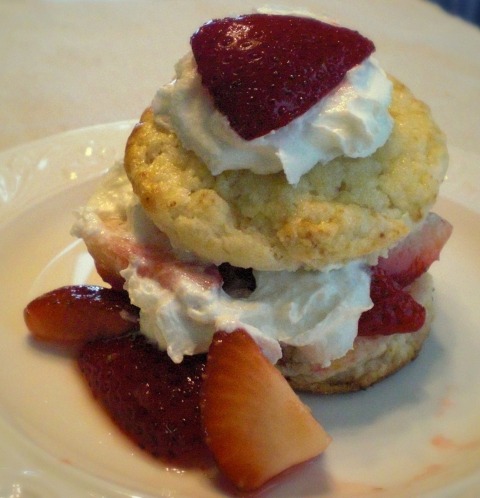
Homemade Strawberry Shortcake
June 28, 2011 § Leave a comment
One of the absolute best things about summer is strawberries. Especially those freshly picked and sold at your local farmers market.
With strawberries comes strawberry shortcake. It is a summer must! In my opinion, the best strawberry shortcake is one made with a homemade shortcake. So, here it is…my recipe for shortcake.

Shortcake
- 2 cups all-purpose flour
- 1/4 cup granulated sugar
- 1 tablespoon baking powder
- 1/2 teaspoon salt
- 1 stick of unsalted butter, cold and cut into small pieces
- 1 tablespoon grated orange zest
- 2/3 cup milk
- 1 egg, lightly beaten
Preheat oven to 425 degrees. In a large bowl, combine the flour, baking powder, salt, and sugar. Incorporate butter into dry ingredients using a pastry cutter. Blend until the flour resembles course crumbs. Add the grated orange rind and milk. Gently combine together being careful not to work the dough too much. You just want to knead until the dough comes together. Lightly flour counter and pat the dough out into a 12″ round about 1″ thick. Use a biscuit cutter about 2 1/2″ in diameter. Cut out 8-9 biscuits. You may have to reshape dough after a few cuts. Place them on a baking sheet lined with a silpat or parchment paper. Brush the top of each with a lightly beaten egg and then sprinkle with coarse sugar. Bake for 12 minutes or until golden brown. Remove from oven a cool on a wire rack.
Strawberries
-
1 lb whole fresh strawberries
- 1/4 cup granulated sugar
Wash, remove stem and cut up strawberries. Put into medium size bowl. Add sugar, mix and let sit for about 30 minutes. The sugar will dissolve and make a syrup which is great over the shortcake.
Cut the shortcake through the center. Place the bottom portion on a plate. Add strawberries with its syrup juice. Add whipped cream. Place on the top of the cake. Add more whipped cream and strawberries. Serve.
Note: I used a can of whipped cream here. No, it isn’t homemade. I could have made it from scratch but my son LOVES to have the whipped cream squirted in his mouth from the can. I love to make him happy, so we keep a can in the fridge. Maybe you should too!


